Spreadsheet Preparation & Ideal Layout
DocuTrack HR is designed to fit your existing spreadsheet without forcing you to change your workflow. However, following a clean structure ensures 100% reliable tracking and prevents any overwritten data.
- Column A (Full Name): The staff member's full name (e.g., Sarah Jenkins).
- Column B (Staff Email): Their valid email address (e.g., s.jenkins@academyschool.edu).
- Column C (Visa Expiry Date): Formatted as a date in DD/MM/YYYY.
- Column D (Visa Status): Keep this column completely blank! DocuTrack HR writes the automated "VALID", "URGENT", and "APPROACHING" color pills here.
- Column E (90-Day Due Date): The 90-day immigration report date in DD/MM/YYYY.
- Column F (90-Day Status): Keep blank for automated status output.
- Column G (Notification Log): Keep blank for automated dispatch timestamps.
Connecting & Mapping Columns in the Sidebar
Once your spreadsheet is ready, open the DocuTrack HR sidebar to establish the data link:
- In your Google Sheet menu bar, click Extensions → DocuTrack HR → Open Settings.
- If this is your first time, the onboarding card will welcome you. Click GET STARTED.
- On the Setup tab, select your worksheet name from the dropdown (e.g., Teachers & Staff).
- Under 1. Data Locations, enter the column letters for Staff Names (A), Email (B), and your Expiry Dates (C, E).
- Under 2. Output Locations, enter the column letters where you want the Status Badges (D, F) and the Notification Log (G) to be written.
- Click the blue Save System Setup button at the bottom.
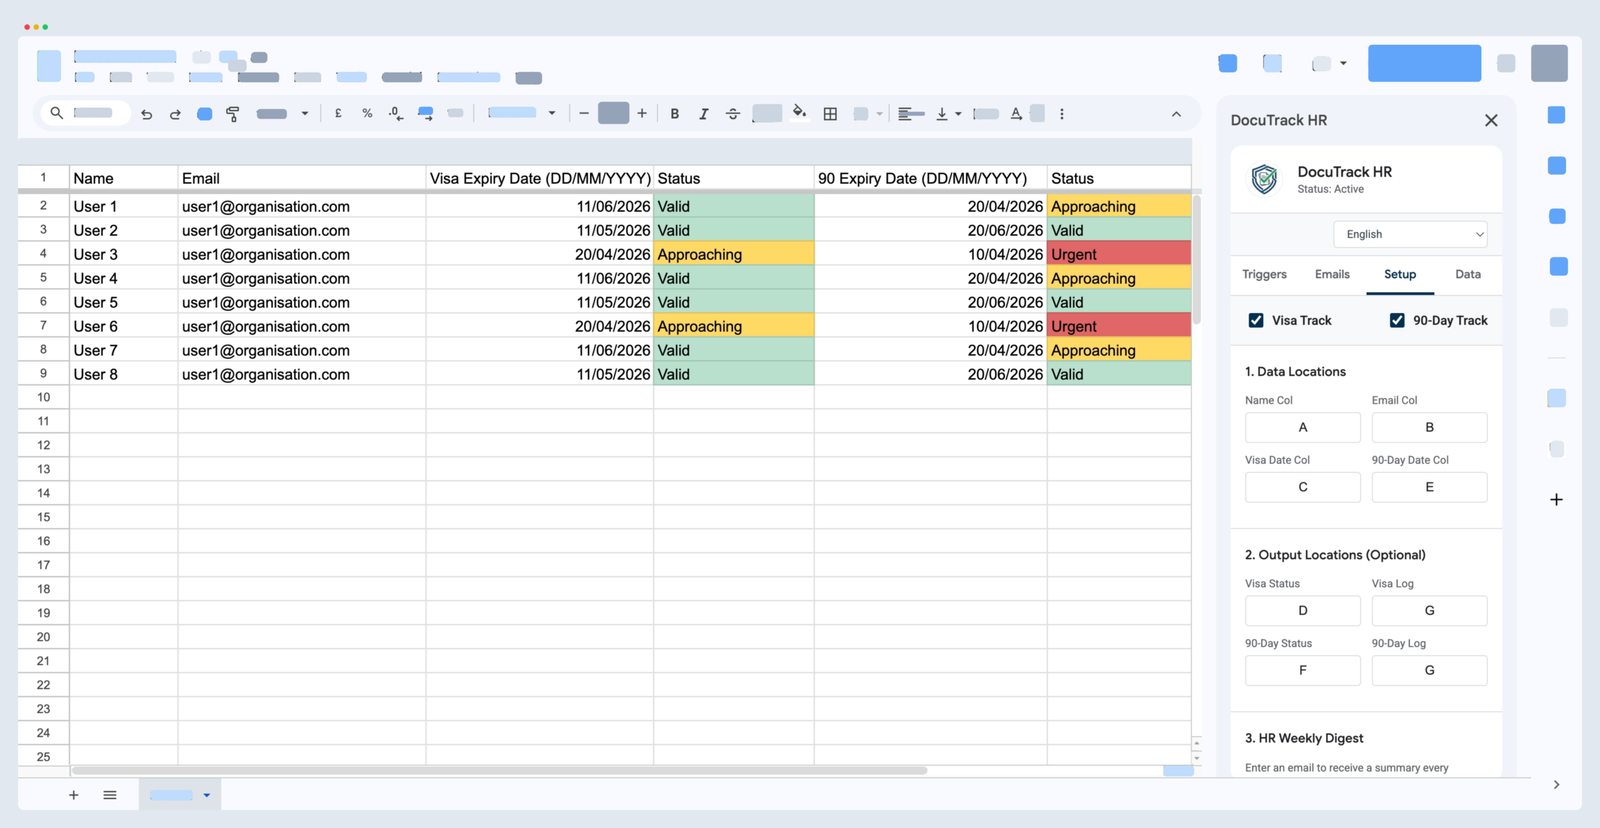
What happens next: The add-on immediately scans your worksheet, calculates remaining days against today's date, and instantly fills your status columns with green VALID, amber APPROACHING, or red URGENT pills!
Configuring Automated Reminders & Milestones
Now that your sheet has live color statuses, tell DocuTrack HR when to notify staff members:
- Navigate to the Triggers tab in the sidebar.
- Tick the reminder milestone checkboxes you want staff to receive (e.g., 30 Days Before and 15 Days Before).
- If your institution requires specific timing, tick Custom and input your required days separated by commas (e.g. 60, 45, 10).
- Click Save & Activate.
Personalizing Emails with School Branding
Staff are much more responsive to emails that look official and recognizable.
- Click on the Emails tab in the sidebar.
- Logo URL: Paste a direct public URL to your school or corporate logo (must end in
.pngor.jpg). - Custom Subject: Write a clear subject line (e.g. "Important: Action Required for Teacher Visa Renewal").
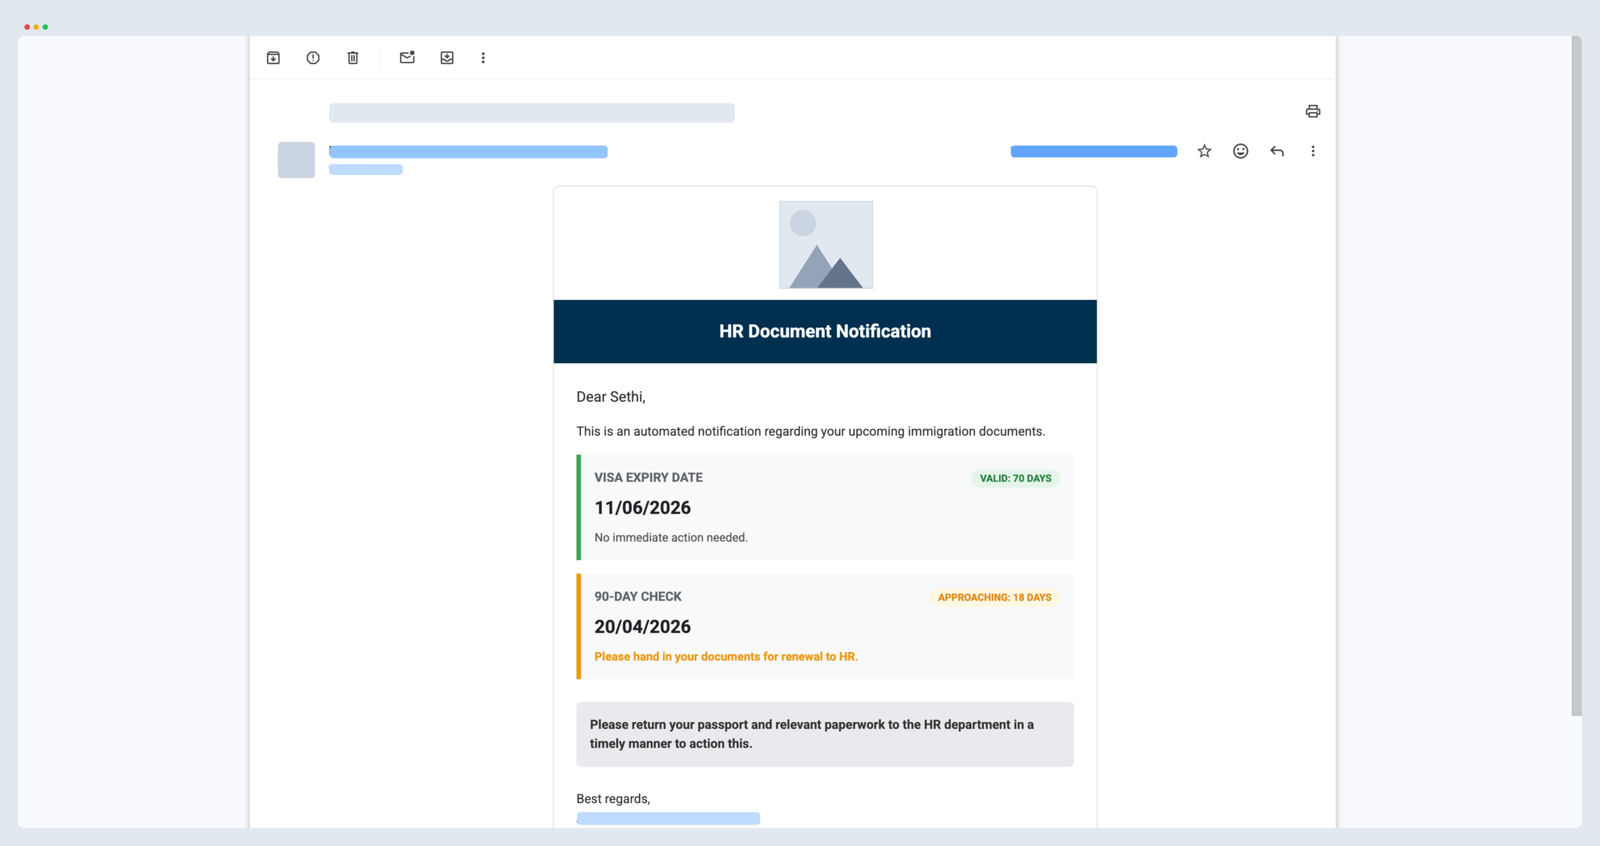
- Personalized Message: Write your introductory paragraph. Insert the dynamic tag [NAME] and the system will automatically insert each staff member's actual name!
- Custom Footer: Add your office location, HR office hours, and contact details.
- Click Preview Email to launch the native high-fidelity modal dialog and review how staff will view the email on both desktop and mobile devices.
How Google Sheets Filters Interact with DocuTrack HR
A common question from HR testers is: "If I apply a Sheets filter on my Status column (e.g. filtering for 'URGENT'), why do the other cell values disappear?"
In Google Sheets, when you filter a column to show only URGENT, the spreadsheet does not delete or overwrite non-matching rows—it simply hides them from view. The row numbers on the left will turn green and skip rows (e.g. Row 1, Row 4, Row 9).
To bring all rows back immediately, click Data → Turn off filter or click the filter funnel icon on the column header and choose (Select All).
Two Golden Rules for Filtering:
- Select the Whole Table: Always select cell
A1or the entire sheet before clicking Data → Create a filter. If you only select Column D, only that single column will filter, misaligning it from the staff names. - Use Filter Views for Collaboration: If multiple HR staff share the same spreadsheet, use Data → Filter views → Create new filter view. This allows you to filter for urgent documents without changing the display for other administrators currently viewing the sheet.
Maintaining a Permanent Compliance Audit Trail
International school accreditations and corporate immigration audits require proof that employees were notified in a timely manner.
DocuTrack HR maintains a rolling 60-day notification log. Whenever an email is sent (either automatically at 8:00 AM or via an on-demand manual blast), the exact timestamp and days remaining are logged.
To generate an accredited compliance report, open the sidebar, click on the Data tab, and click Export Logs to Sheet. DocuTrack HR will automatically create an "Exported Logs" spreadsheet tab formatted with bold headers, timestamp records, recipient emails, and documented actions.